Summer camp cooking should be simple, satisfying, and uneventful. The goal is not to build a complicated backcountry kitchen; it is to keep cold food cold, hot food controlled, hands reasonably clean, and animals out of your supplies. Warm weather raises the stakes because bacteria multiply faster, ice disappears sooner, and tired campers make sloppy decisions around stoves, knives, and fires. A little structure before you leave home makes camp meals safer and much less stressful.
Warm-Weather Camping Food Safety Starts Before You Pack
Food safety at camp is mostly about time and temperature. Perishable foods such as meat, poultry, fish, eggs, dairy, cooked rice, cut fruit, and prepared salads should not sit for long in the temperature range where bacteria grow quickly. In summer, that window can open fast: during a fuel stop, while setting up camp, or when a cooler is repeatedly opened for drinks.
The best strategy is to reduce the amount of high-risk food you bring, then manage the rest deliberately. Build your menu around meals that are easy to cook completely, easy to store, and easy to clean up after. Save the fragile ingredients for the first night and lean on shelf-stable foods later in the trip.
Better warm-weather camp foods
- First-night fresh foods: marinated meats, fresh sausages, leafy salads, soft cheeses, and other items that should be used early.
- Mid-trip reliable foods: hard cheeses, tortillas, pre-cooked grains, eggs in a protected container, firm vegetables, cured meats, nut butters, and canned fish.
- Late-trip shelf-stable meals: dehydrated meals, pasta, rice packets, canned beans, instant oats, soup mixes, lentils, and freeze-dried ingredients.
- Low-mess snacks: trail mix, jerky, whole fruit, crackers, granola bars, roasted chickpeas, and electrolyte drink mixes.
If you are feeding a group, label meals by day and avoid “mystery leftovers.” A simple tape label that says “Friday dinner” or “eat first” prevents the cooler from becoming a guessing game. Pre-portioning also helps reduce the number of times raw food containers are opened at camp.
Cooler Packing Strategy That Actually Works
A cooler is not a refrigerator. It is a temporary cold box that loses efficiency every time it is opened, every time warm air gets in, and every time meltwater is allowed to slosh around food packaging. The best cooler plan uses layers, separation, and discipline.
Use a two-cooler system when possible
For car camping, overlanding, or basecamp trips, two coolers are better than one. Use one cooler for drinks and frequently accessed snacks. Use the second cooler for perishable meal ingredients and open it only when cooking. The drink cooler will be opened constantly, so do not make it responsible for protecting raw chicken.
Pack in reverse order
Place the last meal you plan to cook at the bottom and the first meal on top. Keep raw meat sealed in leakproof containers or double bags and place it low in the cooler where it stays coldest and cannot drip onto ready-to-eat foods. Use block ice or frozen water bottles for long-lasting cold, and add cubed ice only where it helps fill gaps.
Cooler packing checklist
- Pre-chill the cooler with ice or frozen water bottles before loading if you have time.
- Freeze what you can, including meats, stews, sauces, and water bottles.
- Use watertight containers for raw meat, dairy, and prepared foods.
- Keep drinks separate from perishable meal ingredients.
- Fill empty air space with ice, towels, or frozen bottles to slow warming.
- Store the cooler in shade and cover it with a light-colored blanket or reflective cover.
- Drain meltwater only when necessary; cold water can help maintain temperature, but it should not contact food directly.
- Use a thermometer if carrying high-risk foods in hot weather.
A small refrigerator thermometer inside the food cooler is inexpensive insurance. It removes guesswork and helps you decide when something is still safe or should be discarded. If the trip depends on keeping meat cold for several days in severe heat, consider whether a powered fridge, dry ice, or a simpler menu is the better solution.
Camp Stove and Fire Control
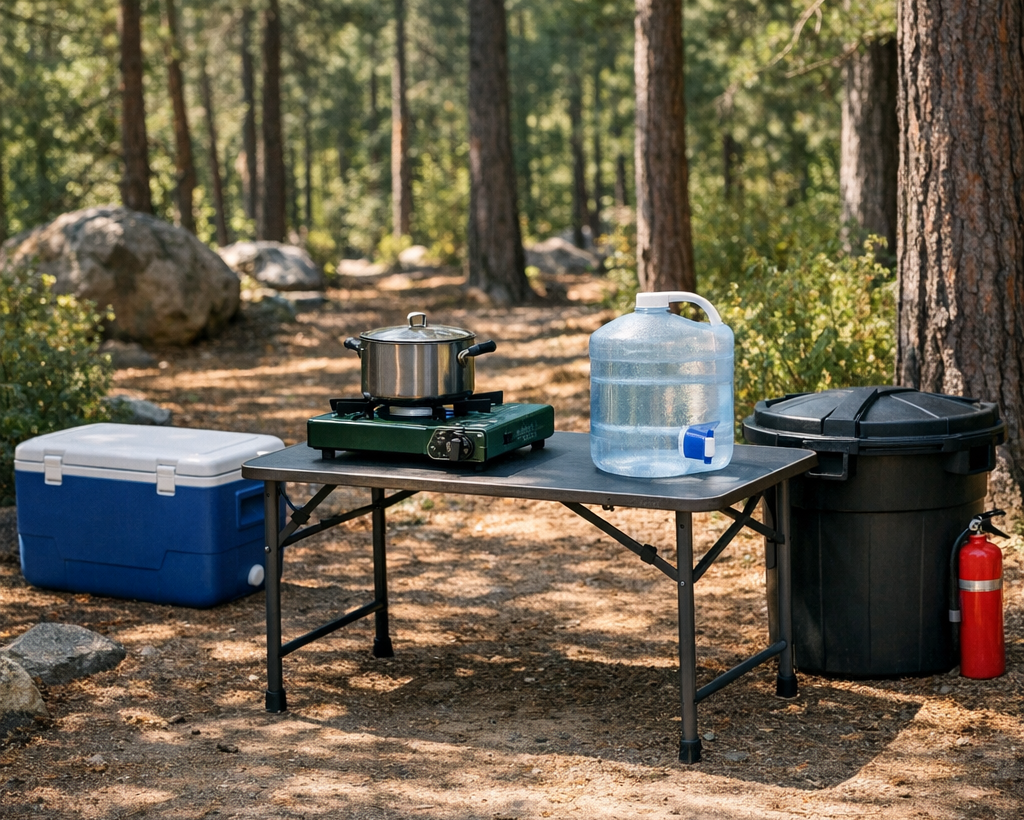
Most camp cooking injuries come from rushed setup, unstable surfaces, flare-ups, and poor fuel handling. The safer kitchen starts with a dedicated cooking area that is level, ventilated, and away from tents, dry grass, vehicles, and foot traffic.
Set stoves on stable surfaces and keep fuel canisters, paper towels, food packaging, and sleeves away from burners. Never cook inside a tent or enclosed vehicle. Carbon monoxide is odorless, and small stoves can create dangerous conditions quickly in enclosed spaces.
Stove safety habits
- Check connections before lighting a stove, especially after transport over rough roads.
- Light the stove with the pot off when practical, then place cookware once the flame is stable.
- Turn pot handles inward so they cannot be bumped by kids, dogs, or tired adults.
- Keep a lid nearby to smother small pan flare-ups.
- Use the right cookware for the stove size so pots do not tip.
- Shut fuel off at the source when cooking is finished.
Open fires add another layer of responsibility. Use established fire rings where allowed, check current fire restrictions, and keep flames small enough to cook over rather than entertain around. A tall flame is not a cooking tool; it is a heat source you no longer fully control.
Basic fire control kit
- Water bucket or collapsible water container filled before cooking starts
- Small shovel for ash and soil control
- Heat-resistant gloves or leather work gloves
- Long-handled tongs
- Clear zone free of leaves, grass, food wrappers, and fuel bottles
When extinguishing a campfire, drown it, stir it, and feel for heat before leaving. Ash can stay hot long after flames disappear. If you cannot put a fire fully out, it was too large for the situation.
Bear and Animal Food Storage
Food storage is not just a bear-country issue. Raccoons, rodents, foxes, ravens, coyotes, and campground dogs can all turn a careless kitchen into a mess. Once animals get rewarded with human food, they become more aggressive, more destructive, and often more dangerous to themselves and people.
Follow local rules first. Some parks require bear canisters, bear lockers, or specific hanging methods. In many developed campgrounds, metal food lockers are provided for a reason. Use them for food, trash, coolers, cooking gear, scented toiletries, pet food, and anything that smells like a meal.
Animal-resistant camp routine
- Cook away from sleeping areas when possible, especially in bear country.
- Never store food in tents, including snacks, wrappers, and flavored drinks.
- Secure trash immediately instead of letting a bag hang from the picnic table.
- Wipe down tables after cooking and eating.
- Store pet food like human food, not beside the tent door.
- Use approved bear canisters or lockers where required.
Vehicle storage is not always enough. In some regions, bears have learned to break into vehicles for coolers and food bags. If local guidance says not to store food in vehicles, take that seriously. If vehicle storage is allowed, keep food out of sight, windows fully closed, and odors contained.
Hand Hygiene Without a Sink
Dirty hands are one of the easiest ways to contaminate safe food. Campers touch fuel bottles, pets, firewood, fishing gear, shared tools, and picnic tables, then reach into a bag of chips. Hand sanitizer helps, but it does not replace washing when hands are greasy, muddy, or coated in food residue.
A simple handwashing station should be easier to use than skipping it. Set it up near the kitchen but not where runoff flows into the cooking area or water source. A gravity-fed water jug with a spigot, biodegradable soap, and a small towel or paper towels will cover most situations.
Wash hands before
- Handling ready-to-eat foods
- Cooking or serving meals
- Eating snacks from shared bags
- Preparing infant food or pet food
Wash hands after
- Handling raw meat, poultry, fish, or eggs
- Using the bathroom or changing diapers
- Touching trash, fuel, pets, or animal waste
- Collecting firewood or handling dirty gear
For group trips, make handwashing visible. People are more likely to use the system if it is set up before dinner prep begins, not buried in a tote under the stove.
Cleaning Station Basics
A clean camp kitchen does not need to look domestic. It needs to separate dirty from clean, keep food scraps contained, and avoid attracting animals. The best system is a three-part rhythm: scrape, wash, rinse or sanitize.
Start by scraping plates and pans into trash before adding water. Food particles in wash water create odors, attract animals, and make disposal harder. Use a fine mesh strainer if needed, then pack food scraps out with your trash.
Basic dishwashing setup
- Wash basin: warm water and a small amount of soap
- Rinse basin: clean water to remove soap and residue
- Sanitize step: follow appropriate guidance for sanitizer concentration when needed, especially for group kitchens
- Drying area: clean towel, mesh drying rack, or dedicated surface away from dust and animals
- Wastewater plan: dispose of gray water according to local rules, well away from natural water sources
Do not wash dishes directly in lakes, rivers, or streams. Even biodegradable soap does not belong in waterways. Carry water away from the source, wash at camp, strain food particles, and dispose of wastewater as directed by the land manager.
Low-Drama Gear Choices
The best camp kitchen gear is not always the most expensive. It is the gear that is easy to clean, hard to misuse, and simple enough that everyone in the group understands the system. Avoid fragile gadgets and single-use tools that complicate packing without improving safety.
Useful gear that earns its space
- Hard-sided cooler or powered fridge: choose based on trip length, heat, and vehicle power availability.
- Cooler thermometer: small, cheap, and helpful for real decisions.
- Color-coded cutting boards: one for raw meat, one for ready-to-eat foods.
- Dedicated raw-meat container: leakproof, washable, and stored low in the cooler.
- Long lighter and backup matches: stored dry and separate from the main kitchen bin.
- Collapsible water jug with spigot: turns hygiene from an intention into a habit.
- Metal tongs and heat gloves: safer around grills, fires, and hot cookware.
- Trash bags and odor-resistant storage: boring until you really need them.
For overlanders and remote travelers, a 12-volt fridge can reduce ice runs and improve temperature control, but it adds dependence on batteries, wiring, and charging. For weekend campers, a well-packed cooler may be simpler and more reliable. Match the tool to the trip, not the marketing photo.
Key Takeaways
- Plan meals by risk and timing: eat fragile fresh foods early and shift toward shelf-stable meals later.
- Separate drinks from perishables: a two-cooler system keeps the food cooler closed longer.
- Control flames before cooking: stable stove placement and small fires prevent most kitchen accidents.
- Store all scented items properly: food, trash, toiletries, and pet food can all attract animals.
- Make hygiene easy: a visible handwashing and dishwashing station beats good intentions.
- Choose gear that simplifies decisions: thermometers, leakproof containers, and basic fire tools are more useful than complicated gadgets.
Preparation Without Fearmongering
Most camp kitchen problems are preventable with ordinary systems. You do not need to be nervous about cooking outdoors, but you do need to respect heat, fuel, wildlife, and sanitation. Build a menu that fits the weather, pack the cooler with intention, set up a controlled cooking area, and make cleanup part of the meal rather than an afterthought.
Good camp food should make the trip better, not create a rescue problem or a midnight animal visit. Keep the process simple, repeatable, and visible to everyone in camp. That is how summer meals stay safe without turning the campsite into a commercial kitchen.
Related Resources
- FoodSafety.gov: Food Safety by Events and Seasons — Practical government guidance for handling food safely during warm-weather activities, travel, and outdoor meals.
- USDA FSIS: Danger Zone 40°F–140°F — Clear explanation of the temperature range where bacteria grow quickly and why cooler management matters.
- National Park Service: Storing Food in Bear Country — Official guidance on bear-aware food storage, scented items, and campsite behavior.
- CDC: When and How to Wash Your Hands — Useful handwashing basics that translate well to camp kitchens and group outdoor meals.